Version Control and Git
This material was adapted from ENV 872 - Environmental Data Analytics and developed by Prof. John Fay.
Version Control
Version control is the process by which all changes to code, text, and files are tracked. In this manner, we’re also able to maintain data and information to support collaborative projects, but to also make sure your analyses are preserved.
GitHub is the web hosting platform for maintaining our Git repositories. Our version control system for the purposes of this course is Git.
GitHub repositories come in two forms: public and private. All the project repositories you will use for this course are public. There may be situations in the future in which you may want to make use of private repositories, in which data and progress are protected from public view. Private repositories can be made public at a later date.
LICENSING
Licensing is also important to specify who and how your code can be used by others. Various license types are available for use with a decision tree available here. For the purposes of this work, we recommend a GNU General Public License version 3. This is a free and widely-trusted copyleft license. A copyleft is an arrangement whereby software or artist work may be used, modified, and distributed freely on condition that anything derived from it is bound by the same condition. Unless you plan to charge a fee for use of your code, the GPLv3.0 comes highly recommended.
For more information about licensing your code, check out https://help.github.com/articles/licensing-a-repository/
FUNCTIONS IN GIT
There are two ways to diverge code from a main project: branching and forking A branch is a temporary segment often used for development. We will not be making use of branching for the purposes of this class, but it is worth spending some time reading about them to see how they can be incorporated into collaborative projects. A fork is a copy or clone of the main project. Forking allows for greater oversight in the merging process and prevents changes being committed to the main project.
INTEGRATING GIT AND RSTUDIO
Forking and Cloning
-
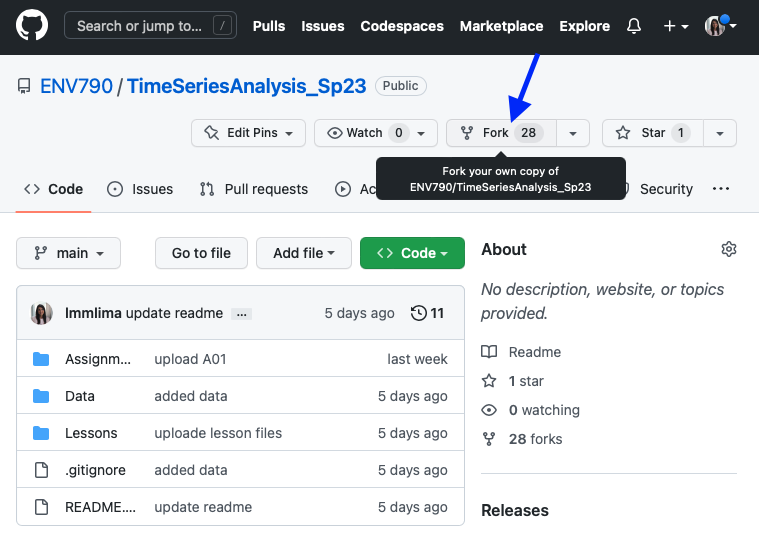
Go to the following repository on GitHub: https://github.com/ENV790/TimeSeriesAnalysis_Sp23
-
Sign in (via the button in the upper right corner).
-
In the upper right corner, click the “fork” button. This will prompt you to create a copy of this repository in your own user account. See image below. This is called a fork of the original repository, which you can edit rather than simply download.
- Clone your repository to your local drive using RStudio.
-
Copy the GitHub repository URL of your cloned repository - not the main class repository.
-
Click the green “Code” button to expose the Clone sub-menu. With the
HTTPSoption selected, click the icon which copies the forked repsository’s URL to your clipboard.

- Launch RStudio and select “New Project” from the File menu. Choose “Version Control” and “Git.”
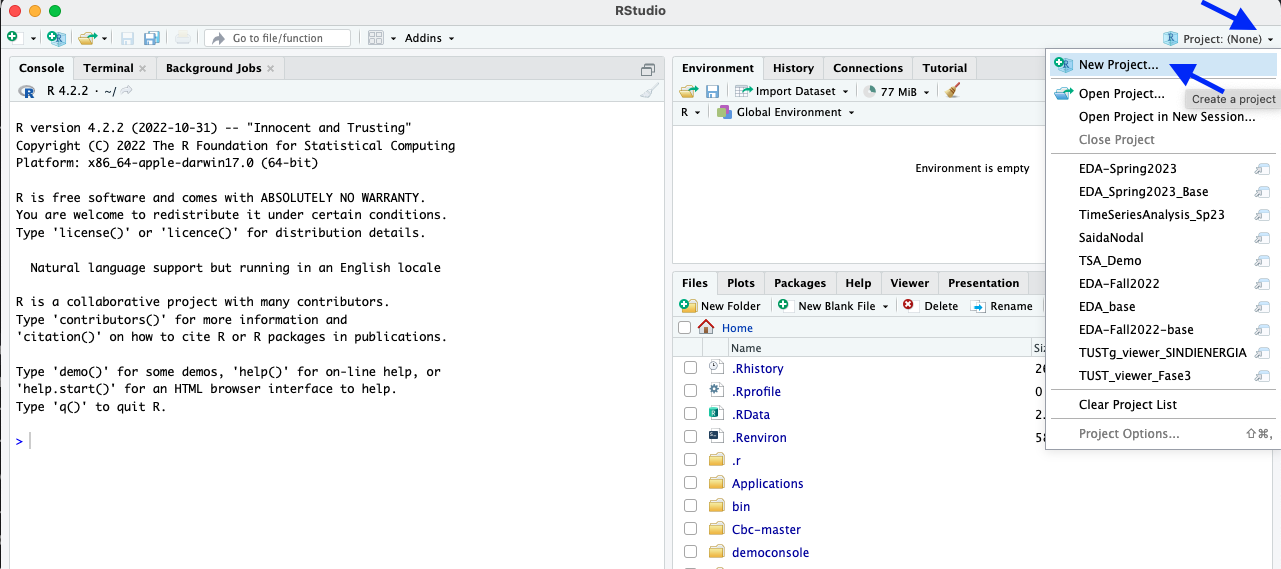
- Paste the repository URL and give your repository a name and a file path. The file path should be one that persists permanently, i.e., either on the course server for lab computers or a dedicated space on your personal computer.
You now have tracked the course repository (i.e., the “upstream”), forked the repository into your own account (i.e., the “remote”), and cloned the repository to your drive (i.e., the “local”). We will be updating each of these repositories as the course progresses.
Note: Clone with SSH is an option as well. For a guide on creating SSH keys, see the Duke Libraries online guide here and navigate to the “Generate SSH keys” section: https://git-rfun.library.duke.edu/outline.html#generate_ssh_keys_in_advance_of_the_workshop.
Adding your GitHub credentials to your local repository
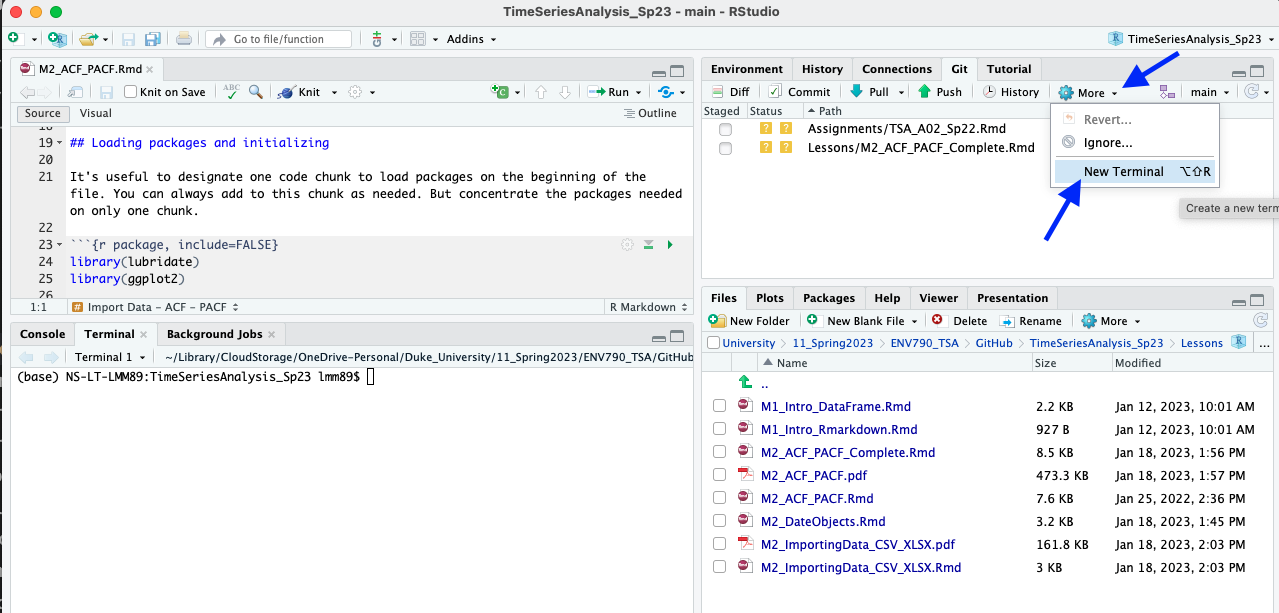
- In RStudio, activate the Git menu, and from this menu click the
 icon, and select the
 Shell...option. This will open up the Git Bash shell for this repository.
- At the shell prompt type the following two commands to set you repository’s user name and email, replacing my Git username and email with the username and email associated with your GitHub account:
$ git config user.name ‘yourusername’
$ git config user.email ‘youremail’
Note: You do not need to type the $.
- Add you Personal Access Token (PAT). Please look at the Step 3 direction in this link.
Editing, Committing, Pushing
-
Navigate to the “README.md” file in the Files tab and open it.
-
Type your name after “Student:” and save.
-
Now that you have edited a file, it should now appear in the Git tab. Click the box to the left of the file, where a check mark should now appear.
-
Press the “Commit” button. A new window should appear that shows the changes that have been made to the file.
-
Write a message detailing the edits you’ve made to the README file. You should always include a commit message to your commits so that your future self and/or your collaborators will know what changes were made. Click “Commit”.
-
Click the green upward facing arrow: the “Push” button. Your remote repository is now up to date with your local repository.
The commit command records the changes you’ve made to files in your project. Commits are useful to track important milestones in your progress. You should always make a commit at least once every time you log onto a project (e.g., once daily). However, simply committing your changes does not save those changes to your remote repository. This is where push comes in. By pushing your new commits to the remote repository, you are ensuring that your local and remote repositories contain the same changes. You must have an internet connection to push, but you can make several commits offline and push them when you regain an internet connection.
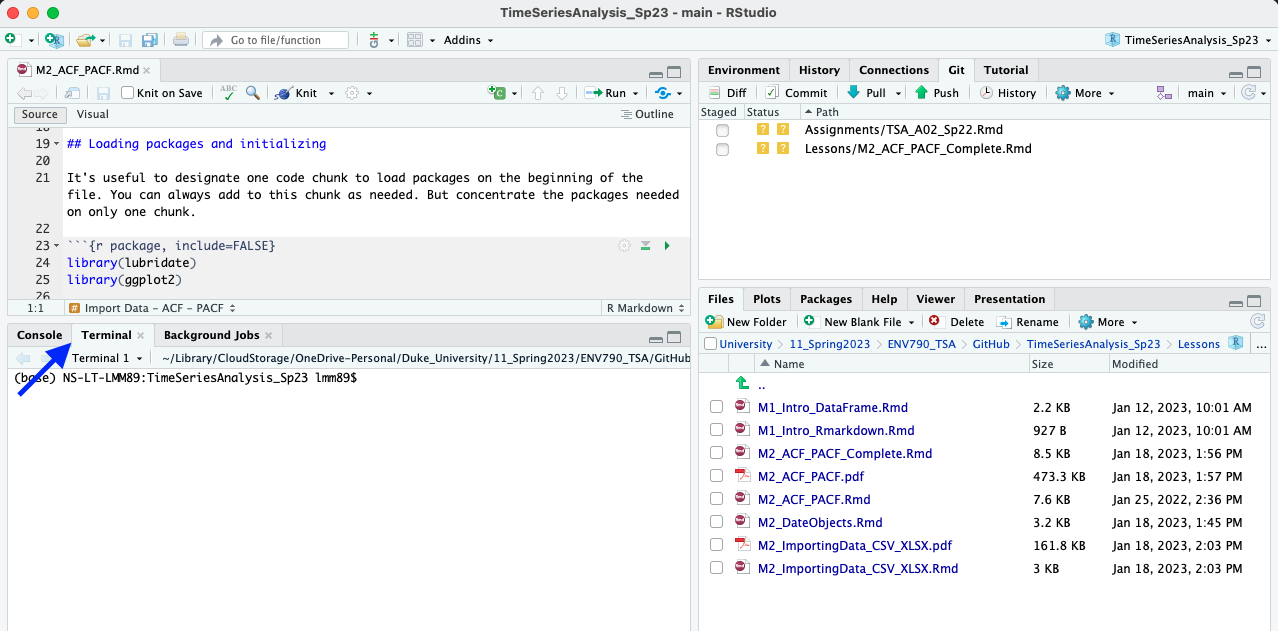
Commits and pushes can also be done in the Terminal by typing commands (i.e., the command line). Navigating to the Terminal tab will allow you to type these commands. The relevant commands are:
$ git commit
$ git push
Note: files must be staged in order to use the command git commit, and a commit message must still be used.
If you are using a Mac, you will need to take the following steps to enter your commit message:
-
press “i” to indicate insert
-
write your merge message
-
press “esc” to indicate you are exiting the insertion
-
write “:wq” to indicate write then quit
-
press enter
Pulling from the Remote
If there are changes in your remote repository that you want to incorporate into your local repository, you will need to pull them into your local repository.
- Click the blue downward facing arrow: the “Pull” button. Your local repository is now up to date with your remote repository.
Pulling from the Upstream Remote
Your instructors will regularly update the course repository. However, this will not update the repository that you’ve forked into your own user account (i.e., remote) unless you tell it to do so.
Type the following commands into the Terminal window in RStudio (bottom left)
$ git remote add upstream https://github.com/ENV790/TimeSeriesAnalysis_Sp23
$ git pull upstream main
An alternate to pull is fetch + merge:
$ git fetch upstream main
$ git merge upstream
Note: these steps will update your local repository, but will not update your remote. To bring your remote up to date, you will need to push your changes.
Note: you will not be pushing any of your changes to the upstream remote, as you do not have the appropriate permissions to do so.
Merge
Sometimes, files in your local and remote repositories will have changes that are different. In this case, you will need to merge the files together in a way that incorporates the changes in a manner that you choose (merge). When a merge conflict occurs, you will need to open the conflicted file in RStudio, review any edits that are inconsistent across versions, and make edits to incorporate all desired updates. You may then commit and push.